


“That does it!” I thought yesterday, after I shot two times a hazel grouse with my .22 WMR Winchester and the bird didn’t die. Sometimes it is really difficult to estimate the correct aiming point for the game, especially when the distances are short why the aiming point changes its place relatively much by the changing distance┬Ā(see the following illustrations) and there is not much time to consider. If the aiming point is estimated wrong, the bullet can easily only wound small birds like the hazel grouses are. Hazel grouses like to live in very thick woods for avoiding hawks. That’s why, most of the time during the hazel grouse hunt the shooting distances are very short, rarely over 30 meters.
Like most rifles, my Winchester 9422 is also designed to shoot somewhere around 50 meters and past, where the bullet trajectory and the line of sights go almost hand in hand (see the coming illustration, the top figure). Because of the relatively small size of the hazel grouses, I need to clearly know and see where I aim and where the bullet goes. In the usual settings the front sight covers the exact hitting point of close targets as the bullet trajectory goes under the line of sights. The front sight is originally elevated too much for the short distances. In the second case in the following image is described what happens if I adjust my original sights really close, like in 10 meters. The aiming figure is now nice for one distance, but it changes a lot even if the distance is varied only little. Thus, I need to always estimate how far my target is and then I need to remember to aim as needed in the current situation. Because of the short distances in the hazel grouse hunting, usually, when the bird comes towards your whistle and reveals itself, there is not much time to consider anything excessive, just to aim and shoot. Furthermore, the original iron sights of the Winchester 9422 are shaped spherically. They give a blurry and ambiguous aiming figure, which results too much errors in the fast shooting actions needed for hunting small and quick hazel grouses.
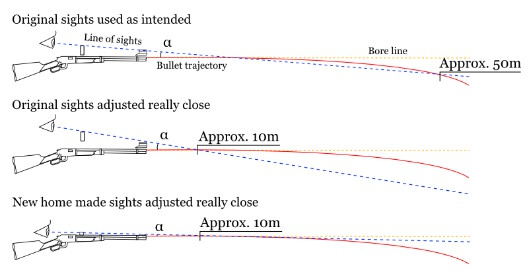
In the upper figure the original sights of Winchester 9422 .22WMR lever action rifle are shown in the intended use. The line of sights cuts the bullet trajectory twice and even after the second one follows nicely the falling bullet. Good setup for shooting moderate to long distances, but for short distances the elevated front sight covers the target. In the middle the rear sight is elevated more, so that the first crossing point of the line of sights and the bullet trajectory is close to the shooter. Now the aiming figure is nice for that specific range, but the figure changes quite much by the changing distance, because the ╬▒ angle is huge. Even a small error in the distance estimation can be too much for the small bird like the hazel grouses are. In the bottom case my short, home made sights make possible that the line of sights goes just above or through the trajectory of a bullet. After a certain distance the bullet falls and separates from the line of sights relatively fast, why this setup is not good for long distances. But for short ranges and for fast, “careless” shots this setup is good, where the aiming figure doesn’t change much by the changing distance. Notice that the ╬▒ angle is smallest in the bottom case an that the images are exaggerated for clarifying the details.
Because of these issues, I decided to replace the old sights and build my own ones. First of all, I wanted to shorten my sights for getting the sighting line go as close as possible next to the bullet trajectory in the ranges under the 30 meters. Next, I wanted to change the spherically shaped sights to more angular ones for getting a clearer aiming figure. The project seemed to be success! Here are images from the previous days and the results of the crafting the new sights ¤Öé Sorry, normal diary storyline included as usual.

In the first place of the weekend’s hunting trip I found the dam of beavers. I decided to stop there for a while for listening the relaxing sound of purling water. Then I grabbed my whistle and started to lure hazel grouses.


Suddenly, I saw a hazel grouse landing on this fallen trunk which pointed almost towards me. The grouse run along the trunk and I knew it would see me if I move too fast. Then, the grouse went behind the thicket and I raised my gun. The grouse followed the trunk towards me and stopped while I aimed it. I shot quickly and the wounded grouse escaped from my sight. Damn! I followed the bird which was still capable to fly. I reached it once again, shot it, but even though the bullet hit the bird again it vanished in the dark thickets. I have planned to change my rifle sights a couple of years already, but during that day I decided to finally start the project and make the changes by myself.

Winchester is ready for taking some measurements and making sighting calculations.

Here are the original sights. I didn’t like them, because the spherical shapes are not as clear as more angular ones could be. Notice how high the rear sight is. That is because the front sight is fixed quite high over the barrel and without enough rear elevation the front sight would cover the exact hitting spot of the bullet in short distances. I made my own rear sight by removing the original one from the supporting/adjusting plate behind it. Then I filed a V-shape in the plate and used it as a new rear sight.

By a hand drill I managed to make this thin hole in the piece of a screw that fitted nicely in the hole of the screw of the original front sight. After I put the whole thing in the barrel I soldered a drop of tin around the nail. Then I filed the nail and the surrounding tin so that I got a nicely shaped, new front sight. I estimated the height of the new front sight by calculations and comparing the sight line with the bore line. The final adjustements I made by shooting. If the tin is too fragile for the rough circumstances of a forest, even though the tin is supported by the screw and the nail, I need to replace the front sight to other one.

For easy adjusting and because I didn’t have black paint, I sooted the sights with fire as a temporary solution.
Watching through the bore.

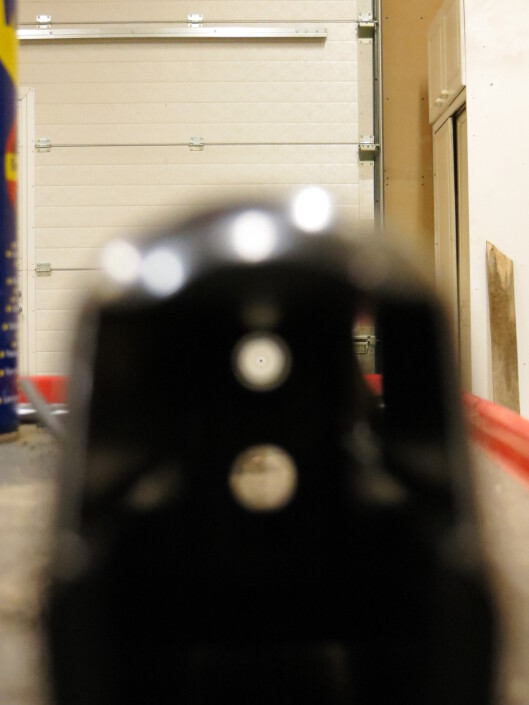
Here are the final sights I made! They work pretty well as the exact hitting spot is easy to find. Horizontally it is in the middle of the front sight and vertically just behind the upper edge of the sight. This is an intuitive way to aim for me. The rear “ears” are still maybe a little bit too tall, because they cover too much the happenings in the front of the barrel. Notice how close the sight line goes above the body of the gun. During the sunny weather this could be a problem, if there are too much disturbing reflections coming out of the body.

How many holes do you see in the piece of the tape? Five bullets, I shot from the different distances between 2.5-30 meters, has passed the tape. I aimed by the same way every time and as you can see the hitting points didn’t change much. The other holes in the paper didn’t include in this experiment.

Then, let’s go hunting! I didn’t shot this hazel grouse since it had buildings near behind it. Instead, I took a couple of photos from the bird. ¤Öé

A couple of other photos from the morning.


During the evening I found this hazel grouse, sitting on a tree. I managed to shoot it after long sneaking, even though it hide in quite dense thickets.

From here I shot the hazel grouse with my new sights. The bird was sitting approximately between those two birches. A common, dense habitat for the hazel grouses. I searched and searched a good hole for shooting the bird and finally found one! I knew that there aren’t any near roads or buildings behind this direction, so it was safe to shoot.


Notice the hazel grouse whistle made from the piece of a tuna tin can during the previous trip. It worked like a charm, although I didn’t need it for shooting this hazel grouse.
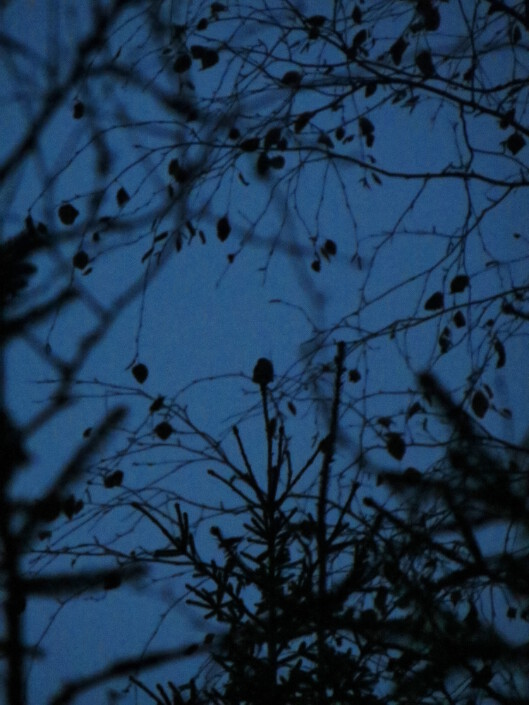
While I cleaned the hazel grouse I heard the sounds of a pygmy owl. I started to chat with the owl by whistling back to it. Soon it got interested and flew above me. They are so small, can you spot the owl sitting right on the top of the distant spruce? ¤śĆ